Oct 28, 2011

Read raw resource of text

Read raw resource of text

Create a raw resource of text, /res/raw/mytext.txt.
Hello!

It's a example of raw text in 
/res/raw/mytext.txt

Some text here:
Android is an operating system for mobile devices such as smartphones and tablet computers. It is developed by the Open Handset Alliance led by Google.


Java main code:
package com.AndroidTextResource;

import java.io.ByteArrayOutputStream;
import java.io.IOException;
import java.io.InputStream;

import android.app.Activity;
import android.os.Bundle;
import android.widget.TextView;

public class AndroidTextResourceActivity extends Activity {
    /** Called when the activity is first created. */
    @Override
    public void onCreate(Bundle savedInstanceState) {
        super.onCreate(savedInstanceState);
        //setContentView(R.layout.main);
        
        TextView myTextView = new TextView(this);
        setContentView(myTextView);
        

        InputStream inputStream = getResources().openRawResource(R.raw.mytext);
        
        ByteArrayOutputStream byteArrayOutputStream 
         = new ByteArrayOutputStream();
        
        String myText = "";
        int in;
  try {
   in = inputStream.read();
   while (in != -1)
         {
    byteArrayOutputStream.write(in);
          in = inputStream.read();
         }
   inputStream.close();
   myText = byteArrayOutputStream.toString();
  }catch (IOException e) {
   // TODO Auto-generated catch block
   e.printStackTrace();
  }

        myTextView.setText(myText);
    }
}


- Read raw text file, and display in ScrollView.

Oct 27, 2011

Using shape to define round drawable

Using shape to define round drawable

To define our shape as a drawable, create XML(s) under /res/drawable/ folder.

/res/drawable/redroundrect.xml
<shape xmlns:android="http://schemas.android.com/apk/res/android">
<solid
android:color="#FFFF0000"/>
<corners
android:radius="15dp" />
<padding
android:left="20dp"
android:top="20dp"
android:right="20dp"
android:bottom="2dp" />
</shape>


/res/drawable/greenroundrect.xml
<shape xmlns:android="http://schemas.android.com/apk/res/android">
<solid
android:color="#FF00FF00"/>
<corners
android:radius="15dp" />
<padding
android:left="20dp"
android:top="20dp"
android:right="20dp"
android:bottom="2dp" />
</shape>


/res/drawable/blueroundrect.xml
<shape xmlns:android="http://schemas.android.com/apk/res/android">
<solid
android:color="#FF0000FF"/>
<corners
android:radius="15dp" />
<padding
android:left="20dp"
android:top="20dp"
android:right="20dp"
android:bottom="2dp" />
</shape>


Using it inside main.xml
<?xml version="1.0" encoding="utf-8"?>
<LinearLayout xmlns:android="http://schemas.android.com/apk/res/android"
android:orientation="vertical"
android:layout_width="fill_parent"
android:layout_height="fill_parent"
>
<TextView
android:layout_width="fill_parent"
android:layout_height="wrap_content"
android:text="@string/hello"
/>
<TextView
android:layout_width="fill_parent"
android:layout_height="wrap_content"
android:text="RED in XML"
android:background="@drawable/redroundrect" />
<TextView
android:layout_width="fill_parent"
android:layout_height="wrap_content"
android:text="GREEN in XML"
android:background="@drawable/greenroundrect" />
<TextView
android:layout_width="fill_parent"
android:layout_height="wrap_content"
android:text="BLUE in XML"
android:background="@drawable/blueroundrect" />
<TextView
android:id="@+id/javared"
android:layout_width="fill_parent"
android:layout_height="wrap_content"
android:text="RED using Java"/>
<TextView
android:id="@+id/javagreen"
android:layout_width="fill_parent"
android:layout_height="wrap_content"
android:text="GREEN using Java"/>
<TextView
android:id="@+id/javablue"
android:layout_width="fill_parent"
android:layout_height="wrap_content"
android:text="BLUE using Java"/>
</LinearLayout>


In Java code
package com.AndroidTestResources;

import android.app.Activity;
import android.graphics.drawable.ColorDrawable;
import android.graphics.drawable.Drawable;
import android.graphics.drawable.GradientDrawable;
import android.os.Bundle;
import android.widget.TextView;

public class AndroidTestResourcesActivity extends Activity {

TextView javaRed, javaGreen, javaBlue;

/** Called when the activity is first created. */
@Override
public void onCreate(Bundle savedInstanceState) {
super.onCreate(savedInstanceState);
setContentView(R.layout.main);

javaRed = (TextView)findViewById(R.id.javared);
javaGreen = (TextView)findViewById(R.id.javagreen);
javaBlue = (TextView)findViewById(R.id.javablue);

Drawable redRoundRect
= getResources().getDrawable(R.drawable.redroundrect);
Drawable greenRoundRect
= getResources().getDrawable(R.drawable.greenroundrect);
Drawable blueRoundRect
= getResources().getDrawable(R.drawable.blueroundrect);

javaRed.setBackgroundDrawable(redRoundRect);
javaGreen.setBackgroundDrawable(greenRoundRect);
javaBlue.setBackgroundDrawable(blueRoundRect);
}
}


Related: Define color drawable in XML


Oct 26, 2011

Define color drawable in XML

Define color drawable in XML

We can define our custom color in XML under /res/values/ folder.

example: /res/values/myresources.xml
<resources>
<drawable name="red_color">#ff0000</drawable>
<drawable name="blue_color">#0000ff</drawable>
<drawable name="green_color">#00ff00</drawable>
</resources>


After color defined, it can be acccessed as drawable in XML or using Java code.
<?xml version="1.0" encoding="utf-8"?>
<LinearLayout xmlns:android="http://schemas.android.com/apk/res/android"
android:orientation="vertical"
android:layout_width="fill_parent"
android:layout_height="fill_parent"
>
<TextView
android:layout_width="fill_parent"
android:layout_height="wrap_content"
android:text="@string/hello"
/>
<TextView
android:layout_width="fill_parent"
android:layout_height="wrap_content"
android:text="RED in XML"
android:background="@drawable/red_color" />
<TextView
android:layout_width="fill_parent"
android:layout_height="wrap_content"
android:text="GREEN in XML"
android:background="@drawable/green_color" />
<TextView
android:layout_width="fill_parent"
android:layout_height="wrap_content"
android:text="BLUE in XML"
android:background="@drawable/blue_color" />
<TextView
android:id="@+id/javared"
android:layout_width="fill_parent"
android:layout_height="wrap_content"
android:text="RED using Java"/>
<TextView
android:id="@+id/javagreen"
android:layout_width="fill_parent"
android:layout_height="wrap_content"
android:text="GREEN using Java"/>
<TextView
android:id="@+id/javablue"
android:layout_width="fill_parent"
android:layout_height="wrap_content"
android:text="BLUE using Java"/>
</LinearLayout>


package com.AndroidTestResources;

import android.app.Activity;
import android.graphics.drawable.ColorDrawable;
import android.os.Bundle;
import android.widget.TextView;

public class AndroidTestResourcesActivity extends Activity {

TextView javaRed, javaGreen, javaBlue;

/** Called when the activity is first created. */
@Override
public void onCreate(Bundle savedInstanceState) {
super.onCreate(savedInstanceState);
setContentView(R.layout.main);

javaRed = (TextView)findViewById(R.id.javared);
javaGreen = (TextView)findViewById(R.id.javagreen);
javaBlue = (TextView)findViewById(R.id.javablue);

ColorDrawable red = (ColorDrawable)getResources().getDrawable(R.drawable.red_color);
ColorDrawable green = (ColorDrawable)getResources().getDrawable(R.drawable.green_color);
ColorDrawable blue = (ColorDrawable)getResources().getDrawable(R.drawable.blue_color);

javaRed.setBackgroundDrawable(red);
javaGreen.setBackgroundDrawable(green);
javaBlue.setBackgroundDrawable(blue);
}
}


Related: Using shape to define round drawable


Using Android device build-in light sensor

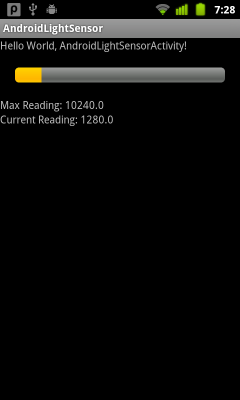
It's a simple light meter Using Android device build-in light sensor. A ProgressBar is defined in main.xml as a indicator of the light sensor. The default value of 100 defined in android:max is a dummy value, it will be updated after lightSensor.getMaximumRange(). The updated reading will be be read in lightSensorEventListener, and update the ProgressBar accordingly.

Using Android device build-in light sensor

package com.AndroidLightSensor;

import android.app.Activity;
import android.content.Context;
import android.hardware.Sensor;
import android.hardware.SensorEvent;
import android.hardware.SensorEventListener;
import android.hardware.SensorManager;
import android.os.Bundle;
import android.widget.ProgressBar;
import android.widget.TextView;
import android.widget.Toast;

public class AndroidLightSensorActivity extends Activity {

ProgressBar lightMeter;
TextView textMax, textReading;

/** Called when the activity is first created. */
@Override
public void onCreate(Bundle savedInstanceState) {
super.onCreate(savedInstanceState);
setContentView(R.layout.main);
lightMeter = (ProgressBar)findViewById(R.id.lightmeter);
textMax = (TextView)findViewById(R.id.max);
textReading = (TextView)findViewById(R.id.reading);

SensorManager sensorManager
= (SensorManager)getSystemService(Context.SENSOR_SERVICE);
Sensor lightSensor
= sensorManager.getDefaultSensor(Sensor.TYPE_LIGHT);

if (lightSensor == null){
Toast.makeText(AndroidLightSensorActivity.this,
"No Light Sensor! quit-",
Toast.LENGTH_LONG).show();
}else{
float max = lightSensor.getMaximumRange();
lightMeter.setMax((int)max);
textMax.setText("Max Reading: " + String.valueOf(max));

sensorManager.registerListener(lightSensorEventListener,
lightSensor,
SensorManager.SENSOR_DELAY_NORMAL);

}
}

SensorEventListener lightSensorEventListener
= new SensorEventListener(){

@Override
public void onAccuracyChanged(Sensor sensor, int accuracy) {
// TODO Auto-generated method stub

}

@Override
public void onSensorChanged(SensorEvent event) {
// TODO Auto-generated method stub
if(event.sensor.getType()==Sensor.TYPE_LIGHT){
float currentReading = event.values[0];
lightMeter.setProgress((int)currentReading);
textReading.setText("Current Reading: " + String.valueOf(currentReading));
}
}

};
}


<?xml version="1.0" encoding="utf-8"?>
<LinearLayout xmlns:android="http://schemas.android.com/apk/res/android"
android:orientation="vertical"
android:layout_width="fill_parent"
android:layout_height="fill_parent"
>
<TextView
android:layout_width="fill_parent"
android:layout_height="wrap_content"
android:text="@string/hello"
/>
<ProgressBar
android:id="@+id/lightmeter"
android:layout_width="fill_parent"
android:layout_height="wrap_content"
android:padding="20dp"
style="?android:attr/progressBarStyleHorizontal"
android:max="100"
android:progress="0"
/>
<TextView
android:id="@+id/max"
android:layout_width="fill_parent"
android:layout_height="wrap_content"
/>
<TextView
android:id="@+id/reading"
android:layout_width="fill_parent"
android:layout_height="wrap_content"
/>
</LinearLayout>


Oct 25, 2011

Start Battery use checking using Intent.ACTION_POWER_USAGE_SUMMARY

Start Battery use checking using Intent.ACTION_POWER_USAGE_SUMMARY

package com.AndroidBatteryUsage;

import android.app.Activity;
import android.content.Intent;
import android.content.pm.PackageManager;
import android.content.pm.ResolveInfo;
import android.os.Bundle;
import android.widget.Toast;

public class AndroidBatteryUsageActivity extends Activity {
/** Called when the activity is first created. */
@Override
public void onCreate(Bundle savedInstanceState) {
super.onCreate(savedInstanceState);
setContentView(R.layout.main);

PackageManager packageManager = getPackageManager();
Intent intent = new Intent(Intent.ACTION_POWER_USAGE_SUMMARY);
ResolveInfo resolveInfo = packageManager.resolveActivity(intent, 0);

if(resolveInfo == null){
Toast.makeText(AndroidBatteryUsageActivity.this,
"No suitable Activity found!",
Toast.LENGTH_LONG).show();
}else{
startActivity(intent);
}
}
}


Oct 21, 2011

Set latitude and longitude in Exif, setAttribute() and saveAttributes().

To modify Exit tag, you can call the method setAttribute(), and call saveAttributes() to save the tags in Exif.

Note 1: You have to grant permission of "android.permission.WRITE_EXTERNAL_STORAGE", otherwise the tags cannot be saved - But no error return to inform you!

Note 2: In this example, the Android build-in Gallery App doesn't recognize the updated Exif GPS location. In order to force MediaStore re-scan the updated file, read here.

Set latitude and longitude in Exif, setAttribute() and saveAttributes().

Modify main.xml to add a button to update Tags.
<?xml version="1.0" encoding="utf-8"?>
<LinearLayout xmlns:android="http://schemas.android.com/apk/res/android"
   android:orientation="vertical"
   android:layout_width="fill_parent"
   android:layout_height="fill_parent"
   >
<TextView 
   android:layout_width="fill_parent"
   android:layout_height="wrap_content"
   android:text="@string/hello"
   />
<ScrollView
   android:orientation="vertical"
   android:layout_width="fill_parent"
   android:layout_height="fill_parent"
>
<LinearLayout
   android:orientation="vertical"
   android:layout_width="fill_parent"
   android:layout_height="wrap_content"
   >
<TextView 
   android:id="@+id/exif"
   android:layout_width="fill_parent"
   android:layout_height="wrap_content"
   />
<ImageView 
   android:id="@+id/image"
   android:layout_width="300dp"
   android:layout_height="300dp"
   />
<Button 
   android:id="@+id/update"
   android:layout_width="fill_parent"
   android:layout_height="wrap_content"
   android:text="Update with dummy location"
   />
</LinearLayout>
</ScrollView>
</LinearLayout>


Implement UpdateExit() to update Exif Tags, with dummy LATITUDE and LONGITUDE.
package com.AndroidExif;

import java.io.IOException;

import android.app.Activity;
import android.graphics.Bitmap;
import android.graphics.BitmapFactory;
import android.media.ExifInterface;
import android.os.Bundle;
import android.view.View;
import android.widget.Button;
import android.widget.ImageView;
import android.widget.TextView;
import android.widget.Toast;

public class AndroidExifActivity extends Activity {

String imagefile ="/sdcard/DCIM/DSC_9599.jpg";
ImageView image;
TextView Exif;
Button updateDummyLoc;

ExifInterface exifInterface;

   /** Called when the activity is first created. */
   @Override
   public void onCreate(Bundle savedInstanceState) {
       super.onCreate(savedInstanceState);
       setContentView(R.layout.main);
       image = (ImageView)findViewById(R.id.image);
       Exif = (TextView)findViewById(R.id.exif);
      
       Bitmap bm = BitmapFactory.decodeFile(imagefile);
       image.setImageBitmap(bm);
      
       Exif.setText(ReadExif(imagefile));
      
       updateDummyLoc = (Button)findViewById(R.id.update);
       updateDummyLoc.setOnClickListener(new Button.OnClickListener(){

  @Override
  public void onClick(View arg0) {
   // TODO Auto-generated method stub
   UpdateExit();
  }});
   }
  
   void UpdateExit(){
    String dummyLATITUDE = "0/1,16/1,5935883/125557";
    String dummyLATITUDE_REF = "N";
    String dummyLONGITUDE = "0/1,7/1,1429891026/483594097";
    String dummyLONGITUDE_REF = "E";
   
    exifInterface.setAttribute(ExifInterface.TAG_GPS_LATITUDE, dummyLATITUDE);
 exifInterface.setAttribute(ExifInterface.TAG_GPS_LATITUDE_REF, dummyLATITUDE_REF);
 exifInterface.setAttribute(ExifInterface.TAG_GPS_LONGITUDE, dummyLONGITUDE);
 exifInterface.setAttribute(ExifInterface.TAG_GPS_LONGITUDE_REF, dummyLONGITUDE_REF);

 try {
  exifInterface.saveAttributes();
  Toast.makeText(AndroidExifActivity.this,
    "saveAttribute finished",
    Toast.LENGTH_LONG).show();
 } catch (IOException e) {
  // TODO Auto-generated catch block
  e.printStackTrace();
  Toast.makeText(AndroidExifActivity.this,
    e.toString(),
    Toast.LENGTH_LONG).show();
 }
   }
  
   String ReadExif(String file){
    String exif="Exif: " + file;
    try {
  exifInterface = new ExifInterface(file);

  exif += "\nIMAGE_LENGTH: " + exifInterface.getAttribute(ExifInterface.TAG_IMAGE_LENGTH);
  exif += "\nIMAGE_WIDTH: " + exifInterface.getAttribute(ExifInterface.TAG_IMAGE_WIDTH);
  exif += "\n DATETIME: " + exifInterface.getAttribute(ExifInterface.TAG_DATETIME);
  exif += "\n TAG_MAKE: " + exifInterface.getAttribute(ExifInterface.TAG_MAKE);
  exif += "\n TAG_MODEL: " + exifInterface.getAttribute(ExifInterface.TAG_MODEL);
  exif += "\n TAG_ORIENTATION: " + exifInterface.getAttribute(ExifInterface.TAG_ORIENTATION);
  exif += "\n TAG_WHITE_BALANCE: " + exifInterface.getAttribute(ExifInterface.TAG_WHITE_BALANCE);
  exif += "\n TAG_FOCAL_LENGTH: " + exifInterface.getAttribute(ExifInterface.TAG_FOCAL_LENGTH);
  exif += "\n TAG_FLASH: " + exifInterface.getAttribute(ExifInterface.TAG_FLASH);
  exif += "\nGPS related:";

  float[] LatLong = new float[2];
  if(exifInterface.getLatLong(LatLong)){
   exif += "\n latitude= " + LatLong[0];
   exif += "\n longitude= " + LatLong[1];
  }else{
   exif += "Exif tags are not available!";
  }
 
  Toast.makeText(AndroidExifActivity.this,
    "finished",
    Toast.LENGTH_LONG).show();
 
 } catch (IOException e) {
  // TODO Auto-generated catch block
  e.printStackTrace();
  Toast.makeText(AndroidExifActivity.this,
    e.toString(),
    Toast.LENGTH_LONG).show();
 }
   
    return exif;
   }

}

Oct 20, 2011

Get latitude and longitude of Exif

Last post described how to Convert GPS tag of ExifInterface to degree, its another easy way to get latitude and longitude of Exif - getLatLong(float[] output) start from API level 5.

It stores the latitude and longitude value in a float array. The first element is the latitude, and the second element is the longitude. Returns false if the Exif tags are not available.

Example:

Get latitude and longitude of Exif

package com.AndroidExif;

import java.io.IOException;

import android.app.Activity;
import android.graphics.Bitmap;
import android.graphics.BitmapFactory;
import android.media.ExifInterface;
import android.os.Bundle;
import android.widget.ImageView;
import android.widget.TextView;
import android.widget.Toast;

public class AndroidExifActivity extends Activity {

String imagefile ="/sdcard/DCIM/DSC_9599.jpg";
ImageView image;
TextView Exif;

/** Called when the activity is first created. */
@Override
public void onCreate(Bundle savedInstanceState) {
super.onCreate(savedInstanceState);
setContentView(R.layout.main);
image = (ImageView)findViewById(R.id.image);
Exif = (TextView)findViewById(R.id.exif);
ImageView image = (ImageView)findViewById(R.id.image);

Bitmap bm = BitmapFactory.decodeFile(imagefile);
image.setImageBitmap(bm);

Exif.setText(ReadExif(imagefile));
}

String ReadExif(String file){
String exif="Exif: " + file;
try {
ExifInterface exifInterface = new ExifInterface(file);

exif += "\nIMAGE_LENGTH: " + exifInterface.getAttribute(ExifInterface.TAG_IMAGE_LENGTH);
exif += "\nIMAGE_WIDTH: " + exifInterface.getAttribute(ExifInterface.TAG_IMAGE_WIDTH);
exif += "\n DATETIME: " + exifInterface.getAttribute(ExifInterface.TAG_DATETIME);
exif += "\n TAG_MAKE: " + exifInterface.getAttribute(ExifInterface.TAG_MAKE);
exif += "\n TAG_MODEL: " + exifInterface.getAttribute(ExifInterface.TAG_MODEL);
exif += "\n TAG_ORIENTATION: " + exifInterface.getAttribute(ExifInterface.TAG_ORIENTATION);
exif += "\n TAG_WHITE_BALANCE: " + exifInterface.getAttribute(ExifInterface.TAG_WHITE_BALANCE);
exif += "\n TAG_FOCAL_LENGTH: " + exifInterface.getAttribute(ExifInterface.TAG_FOCAL_LENGTH);
exif += "\n TAG_FLASH: " + exifInterface.getAttribute(ExifInterface.TAG_FLASH);
exif += "\nGPS related:";

float[] LatLong = new float[2];
if(exifInterface.getLatLong(LatLong)){
exif += "\n latitude= " + LatLong[0];
exif += "\n longitude= " + LatLong[1];
}else{
exif += "Exif tags are not available!";
}

Toast.makeText(AndroidExifActivity.this,
"finished",
Toast.LENGTH_LONG).show();

} catch (IOException e) {
// TODO Auto-generated catch block
e.printStackTrace();
Toast.makeText(AndroidExifActivity.this,
e.toString(),
Toast.LENGTH_LONG).show();
}

return exif;
}

}


next post:
- Set latitude and longitude in Exif, setAttribute() and saveAttributes().


Oct 19, 2011

Convert GPS tag of ExifInterface to degree

If there are GPS info in Exif of JPG, it can be read using ExifInterface.getAttribute(). Refer to the source code in last post, Read Exif of JPG file using ExifInterface.

Read GPS of JPG using ExifInterface.getAttribute()

TAG_GPS_LATITUDE and TAG_GPS_LONGITUDE return String in format of "num1/denom1,num2/denom2,num3/denom3". It can be converted to degree using folowing method:

Latitude (TAG_GPS_LATITUDE)
= 22/1,16/1,5935883/125557
= 22/1 + 16/(1*60) + 5935883/(125557*3600)
= 22 + 0.266666666667 + 0.0131323334333
= 22.2797990001
if TAG_GPS_LATITUDE_REF == "N", it's positive; otherwise it's negative.

Longitude (TAG_GPS_LONGITUDE)
= 114/1,7/1,1429891026/483594097
= 114/1 + 7/(1*60) + 1429891026/(483594097*3600)
= 114 + 0.116666666667 + 0.000821333333328
= 114.117488
if TAG_GPS_LONGITUDE_REF == "E", it's positive; otherwise it's negative.

Related:
- Get latitude and longitude of Exif


Oct 18, 2011

Read Exif of JPG file using ExifInterface

android.media.ExifInterface is a class for reading and writing Exif tags in a JPEG file. It can read and write various Exif Tag from and to JPG files, depends on API Level.

Here is a example with android:minSdkVersion="8", Android 2.2.

Read Exif of JPG file using ExifInterface

package com.AndroidExif;

import java.io.IOException;

import android.app.Activity;
import android.graphics.Bitmap;
import android.graphics.BitmapFactory;
import android.media.ExifInterface;
import android.os.Bundle;
import android.widget.ImageView;
import android.widget.TextView;
import android.widget.Toast;

public class AndroidExifActivity extends Activity {

String imagefile ="/sdcard/DCIM/Camera/myphoto.jpg";
ImageView image;
TextView Exif;

/** Called when the activity is first created. */
@Override
public void onCreate(Bundle savedInstanceState) {
super.onCreate(savedInstanceState);
setContentView(R.layout.main);
image = (ImageView)findViewById(R.id.image);
Exif = (TextView)findViewById(R.id.exif);
ImageView image = (ImageView)findViewById(R.id.image);

Bitmap bm = BitmapFactory.decodeFile(imagefile);
image.setImageBitmap(bm);

Exif.setText(ReadExif(imagefile));
}

String ReadExif(String file){
String exif="Exif: " + file;
try {
ExifInterface exifInterface = new ExifInterface(file);

exif += "\nIMAGE_LENGTH: " + exifInterface.getAttribute(ExifInterface.TAG_IMAGE_LENGTH);
exif += "\nIMAGE_WIDTH: " + exifInterface.getAttribute(ExifInterface.TAG_IMAGE_WIDTH);
exif += "\n DATETIME: " + exifInterface.getAttribute(ExifInterface.TAG_DATETIME);
exif += "\n TAG_MAKE: " + exifInterface.getAttribute(ExifInterface.TAG_MAKE);
exif += "\n TAG_MODEL: " + exifInterface.getAttribute(ExifInterface.TAG_MODEL);
exif += "\n TAG_ORIENTATION: " + exifInterface.getAttribute(ExifInterface.TAG_ORIENTATION);
exif += "\n TAG_WHITE_BALANCE: " + exifInterface.getAttribute(ExifInterface.TAG_WHITE_BALANCE);
exif += "\n TAG_FOCAL_LENGTH: " + exifInterface.getAttribute(ExifInterface.TAG_FOCAL_LENGTH);
exif += "\n TAG_FLASH: " + exifInterface.getAttribute(ExifInterface.TAG_FLASH);
exif += "\nGPS related:";
exif += "\n TAG_GPS_DATESTAMP: " + exifInterface.getAttribute(ExifInterface.TAG_GPS_DATESTAMP);
exif += "\n TAG_GPS_TIMESTAMP: " + exifInterface.getAttribute(ExifInterface.TAG_GPS_TIMESTAMP);
exif += "\n TAG_GPS_LATITUDE: " + exifInterface.getAttribute(ExifInterface.TAG_GPS_LATITUDE);
exif += "\n TAG_GPS_LATITUDE_REF: " + exifInterface.getAttribute(ExifInterface.TAG_GPS_LATITUDE_REF);
exif += "\n TAG_GPS_LONGITUDE: " + exifInterface.getAttribute(ExifInterface.TAG_GPS_LONGITUDE);
exif += "\n TAG_GPS_LONGITUDE_REF: " + exifInterface.getAttribute(ExifInterface.TAG_GPS_LONGITUDE_REF);
exif += "\n TAG_GPS_PROCESSING_METHOD: " + exifInterface.getAttribute(ExifInterface.TAG_GPS_PROCESSING_METHOD);

Toast.makeText(AndroidExifActivity.this,
"finished",
Toast.LENGTH_LONG).show();

} catch (IOException e) {
// TODO Auto-generated catch block
e.printStackTrace();
Toast.makeText(AndroidExifActivity.this,
e.toString(),
Toast.LENGTH_LONG).show();
}

return exif;
}

}


<?xml version="1.0" encoding="utf-8"?>
<LinearLayout xmlns:android="http://schemas.android.com/apk/res/android"
android:orientation="vertical"
android:layout_width="fill_parent"
android:layout_height="fill_parent"
>
<TextView
android:layout_width="fill_parent"
android:layout_height="wrap_content"
android:text="@string/hello"
/>
<ScrollView
android:orientation="vertical"
android:layout_width="fill_parent"
android:layout_height="fill_parent"
>
<LinearLayout
android:orientation="vertical"
android:layout_width="fill_parent"
android:layout_height="wrap_content"
>
<TextView
android:id="@+id/exif"
android:layout_width="fill_parent"
android:layout_height="wrap_content"
/>
<ImageView
android:id="@+id/image"
android:layout_width="300dp"
android:layout_height="300dp"
/>
</LinearLayout>
</ScrollView>
</LinearLayout>


Related post: Convert GPS tag of ExifInterface to degree


Oct 17, 2011

Sort the file list in order, by implementing Comparator.

In the previous example of our file explorer, the files listed not in order. To list it in order, we have to implement our own custom Comparator, filecomparator, to compare the file name.

Involve our comparator on files by calling Arrays.sort(files, filecomparator).

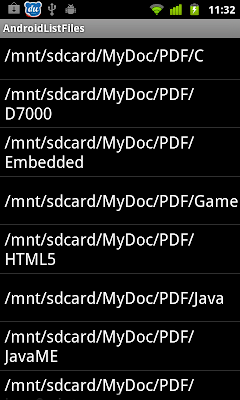
files listed in sorted order

Modify from last post Back in history for File Explorer.

package com.AndroidListFiles;

import java.io.File;
import java.util.ArrayList;
import java.util.Arrays;
import java.util.Comparator;
import java.util.List;
import java.util.Stack;

import android.app.ListActivity;
import android.content.Intent;
import android.net.Uri;
import android.os.Bundle;
import android.os.Environment;
import android.view.View;
import android.webkit.MimeTypeMap;
import android.widget.ArrayAdapter;
import android.widget.ListView;
import android.widget.Toast;

public class AndroidListFilesActivity extends ListActivity {

private List<String> fileList = new ArrayList<String>();

Stack<File> history;

@Override
public void onCreate(Bundle savedInstanceState) {
super.onCreate(savedInstanceState);

history = new Stack<File>();

File root = new File(Environment
.getExternalStorageDirectory()
.getAbsolutePath());
ListDir(root);

}

@Override
protected void onListItemClick(ListView l, View v, int position, long id) {
// TODO Auto-generated method stub
File selected = new File(fileList.get(position));
if(selected.isDirectory()){
ListDir(selected);
}else {
Uri selectedUri = Uri.fromFile(selected);
String fileExtension
= MimeTypeMap.getFileExtensionFromUrl(selectedUri.toString());
String mimeType
= MimeTypeMap.getSingleton().getMimeTypeFromExtension(fileExtension);

Toast.makeText(AndroidListFilesActivity.this,
"FileExtension: " + fileExtension + "\n" +
"MimeType: " + mimeType,
Toast.LENGTH_LONG).show();

//Start Activity to view the selected file
Intent intent;
intent = new Intent(Intent.ACTION_VIEW);
intent.setDataAndType(selectedUri, mimeType);
startActivity(intent);

}
}

void ListDir(File f){

history.push(f);

File[] files = f.listFiles();

Arrays.sort(files, filecomparator);

fileList.clear();
for (File file : files){
fileList.add(file.getPath());
}

ArrayAdapter<String> directoryList
= new ArrayAdapter<String>(this,
android.R.layout.simple_list_item_1, fileList);
setListAdapter(directoryList);
}

Comparator<? super File> filecomparator = new Comparator<File>(){
public int compare(File file1, File file2) {
return String.valueOf(file1.getName()).compareTo(file2.getName());
}
};

@Override
public void onBackPressed() {
// TODO Auto-generated method stub

history.pop(); //remove current directory

if(history.empty()){
super.onBackPressed();
}else{
File selected = history.pop(); //Get the File on Top of history
ListDir(selected);
}

}

}

Oct 16, 2011

Back in history for File Explorer

In the File Explorer in former post "Start activity using intent of ACTION_VIEW, for specified MIME type", the app will quit whenever you press the BACK key. With the help of Stack and onBackPressed(), function of back in history is added.

When you navigate in the file tree, the current directory will be push onto the top of history stack. Once you press BACK key, the overrided onBackPressed() method check empty of the history stack; if not empty - load the last directory; if empty - pass to super.onBackPressed(), = quit.

package com.AndroidListFiles;

import java.io.File;
import java.util.ArrayList;
import java.util.List;
import java.util.Stack;

import android.app.ListActivity;
import android.content.Intent;
import android.net.Uri;
import android.os.Bundle;
import android.os.Environment;
import android.view.View;
import android.webkit.MimeTypeMap;
import android.widget.ArrayAdapter;
import android.widget.ListView;
import android.widget.Toast;

public class AndroidListFilesActivity extends ListActivity {

private List<String> fileList = new ArrayList<String>();

Stack<File> history;

@Override
public void onCreate(Bundle savedInstanceState) {
super.onCreate(savedInstanceState);

history = new Stack<File>();

File root = new File(Environment
.getExternalStorageDirectory()
.getAbsolutePath());
ListDir(root);

}

@Override
protected void onListItemClick(ListView l, View v, int position, long id) {
// TODO Auto-generated method stub
File selected = new File(fileList.get(position));
if(selected.isDirectory()){
ListDir(selected);
}else {
Uri selectedUri = Uri.fromFile(selected);
String fileExtension
= MimeTypeMap.getFileExtensionFromUrl(selectedUri.toString());
String mimeType
= MimeTypeMap.getSingleton().getMimeTypeFromExtension(fileExtension);

Toast.makeText(AndroidListFilesActivity.this,
"FileExtension: " + fileExtension + "\n" +
"MimeType: " + mimeType,
Toast.LENGTH_LONG).show();

//Start Activity to view the selected file
Intent intent;
intent = new Intent(Intent.ACTION_VIEW);
intent.setDataAndType(selectedUri, mimeType);
startActivity(intent);

}
}

void ListDir(File f){

history.push(f);

File[] files = f.listFiles();
fileList.clear();
for (File file : files){
fileList.add(file.getPath());
}

ArrayAdapter<String> directoryList
= new ArrayAdapter<String>(this,
android.R.layout.simple_list_item_1, fileList);
setListAdapter(directoryList);
}

@Override
public void onBackPressed() {
// TODO Auto-generated method stub

history.pop(); //remove current directory

if(history.empty()){
super.onBackPressed();
}else{
File selected = history.pop(); //Get the File on Top of history
ListDir(selected);
}

}

}


next:
- Sort the file list in order, by implementing Comparator.


Oct 15, 2011

Handle the BACK key by overriding onBackPressed()

For API level 5 (Android 2.1) or higher, onBackPressed() callback method is provided. It will be called when the activity has detected the user's press of the back key. The default implementation simply finishes the current activity, but you can override this to do whatever you want.

package com.BackButton;

import android.app.Activity;
import android.os.Bundle;
import android.view.KeyEvent;
import android.widget.Toast;

public class AndroidBackButtonActivity extends Activity {
/** Called when the activity is first created. */
@Override
public void onCreate(Bundle savedInstanceState) {
super.onCreate(savedInstanceState);
setContentView(R.layout.main);
}

@Override
public void onBackPressed() {
// TODO Auto-generated method stub

Toast.makeText(AndroidBackButtonActivity.this,
"BACK key pressed",
Toast.LENGTH_LONG).show();

}


}


Related Post:
- Handle the BACK key by overriding onKeyDown() (For Android OS version before API level 5)

Handle the BACK key by overriding onKeyDown()

onKeyDown(int keyCode, KeyEvent event) will be called when a key was pressed down and not handled by any of the views inside of the activity.

package com.BackButton;

import android.app.Activity;
import android.os.Bundle;
import android.view.KeyEvent;
import android.widget.Toast;

public class AndroidBackButtonActivity extends Activity {
/** Called when the activity is first created. */
@Override
public void onCreate(Bundle savedInstanceState) {
super.onCreate(savedInstanceState);
setContentView(R.layout.main);
}

@Override
public boolean onKeyDown(int keyCode, KeyEvent event) {
// TODO Auto-generated method stub
//return super.onKeyDown(keyCode, event);
if (keyCode == KeyEvent.KEYCODE_BACK){
//Process onKeyDown event of BACK key

Toast.makeText(AndroidBackButtonActivity.this,
"BACK key pressed",
Toast.LENGTH_LONG).show();

return true; //processed
}else{
//Pass to original method to handle the key event
return super.onKeyDown(keyCode, event);
}


}
}


Related Post:
- For API level 5 (Android 2.1) or higher, onBackPressed() callback method is a alternative to handle BACK key.


Oct 14, 2011

java.util.Stack

Stack is a Last-In/First-Out(LIFO) data structure which represents a stack of objects. It enables users to pop to and push from the stack, including null objects. There is no limit to the size of the stack.

Example:

example of using java.util.Stack

package com.AndroidStack;

import java.util.Stack;

import android.app.Activity;
import android.os.Bundle;
import android.view.View;
import android.widget.Button;
import android.widget.EditText;
import android.widget.TextView;
import android.widget.Toast;

public class AndroidStackActivity extends Activity {

EditText input;
TextView content;
Button push, pop;

Stack<String> myStack;

/** Called when the activity is first created. */
@Override
public void onCreate(Bundle savedInstanceState) {
super.onCreate(savedInstanceState);
setContentView(R.layout.main);
input = (EditText)findViewById(R.id.input);
content = (TextView)findViewById(R.id.content);
push = (Button)findViewById(R.id.push);
pop = (Button)findViewById(R.id.pop);
myStack = new Stack<String>();
ShowContent();

push.setOnClickListener(new Button.OnClickListener(){

@Override
public void onClick(View v) {
// TODO Auto-generated method stub
String pushItem = input.getText().toString();
myStack.push(pushItem);
Toast.makeText(AndroidStackActivity.this,
"push: " + pushItem,
Toast.LENGTH_LONG).show();
ShowContent();
}});

pop.setOnClickListener(new Button.OnClickListener(){

@Override
public void onClick(View v) {
// TODO Auto-generated method stub
if(myStack.empty()){
Toast.makeText(AndroidStackActivity.this,
"Empty!",
Toast.LENGTH_LONG).show();
}else{
String popItem = myStack.pop();
Toast.makeText(AndroidStackActivity.this,
"pop: " + popItem,
Toast.LENGTH_LONG).show();
}
ShowContent();
}});
}

void ShowContent(){
if(myStack.empty()){
content.setText("- Empty -");
}else{
String lastContent = "last content: " + myStack.peek();
content.setText(lastContent);
}

}
}


<?xml version="1.0" encoding="utf-8"?>
<LinearLayout xmlns:android="http://schemas.android.com/apk/res/android"
android:orientation="vertical"
android:layout_width="fill_parent"
android:layout_height="fill_parent"
>
<TextView
android:layout_width="fill_parent"
android:layout_height="wrap_content"
android:text="@string/hello"
/>
<EditText
android:id="@+id/input"
android:layout_width="fill_parent"
android:layout_height="wrap_content" />
<Button
android:id="@+id/push"
android:layout_width="fill_parent"
android:layout_height="wrap_content"
android:text="push" />
<Button
android:id="@+id/pop"
android:layout_width="fill_parent"
android:layout_height="wrap_content"
android:text="pop" />
<TextView
android:id="@+id/content"
android:layout_width="fill_parent"
android:layout_height="wrap_content" />
</LinearLayout>


Oct 13, 2011

Start activity using intent of ACTION_VIEW, for specified MIME type.

In the last post, we can Get File Extension and MIME Type. According to the detected MIME Type, we can start another activity with intent of ACTION_VIEW to view the file.

package com.AndroidListFiles;

import java.io.File;
import java.util.ArrayList;
import java.util.List;

import android.app.ListActivity;
import android.content.Intent;
import android.net.Uri;
import android.os.Bundle;
import android.os.Environment;
import android.view.View;
import android.webkit.MimeTypeMap;
import android.widget.ArrayAdapter;
import android.widget.ListView;
import android.widget.Toast;

public class AndroidListFilesActivity extends ListActivity {

private List<String> fileList = new ArrayList<String>();

@Override
public void onCreate(Bundle savedInstanceState) {
super.onCreate(savedInstanceState);

File root = new File(Environment
.getExternalStorageDirectory()
.getAbsolutePath());
ListDir(root);

}

@Override
protected void onListItemClick(ListView l, View v, int position, long id) {
// TODO Auto-generated method stub
File selected = new File(fileList.get(position));
if(selected.isDirectory()){
ListDir(selected);
}else {
Uri selectedUri = Uri.fromFile(selected);
String fileExtension
= MimeTypeMap.getFileExtensionFromUrl(selectedUri.toString());
String mimeType
= MimeTypeMap.getSingleton().getMimeTypeFromExtension(fileExtension);

Toast.makeText(AndroidListFilesActivity.this,
"FileExtension: " + fileExtension + "\n" +
"MimeType: " + mimeType,
Toast.LENGTH_LONG).show();

//Start Activity to view the selected file
Intent intent;
intent = new Intent(Intent.ACTION_VIEW);
intent.setDataAndType(selectedUri, mimeType);
startActivity(intent);

}
}

void ListDir(File f){
File[] files = f.listFiles();
fileList.clear();
for (File file : files){
fileList.add(file.getPath());
}

ArrayAdapter<String> directoryList
= new ArrayAdapter<String>(this,
android.R.layout.simple_list_item_1, fileList);
setListAdapter(directoryList);
}

}


next:
- Back in history for File Explorer


Oct 12, 2011

Get File Extension and MIME Type

We can call the methods getFileExtensionFromUrl() and getMimeTypeFromExtension() of android.webkit.MimeTypeMap class to get File Extension and MIME Type of a file.

example:

Get File Extension and MIME Type

package com.AndroidListFiles;

import java.io.File;
import java.util.ArrayList;
import java.util.List;

import android.app.ListActivity;
import android.content.Intent;
import android.net.Uri;
import android.os.Bundle;
import android.os.Environment;
import android.view.View;
import android.webkit.MimeTypeMap;
import android.widget.ArrayAdapter;
import android.widget.ListView;
import android.widget.Toast;

public class AndroidListFilesActivity extends ListActivity {

private List<String> fileList = new ArrayList<String>();

@Override
public void onCreate(Bundle savedInstanceState) {
super.onCreate(savedInstanceState);

File root = new File(Environment
.getExternalStorageDirectory()
.getAbsolutePath());
ListDir(root);

}

@Override
protected void onListItemClick(ListView l, View v, int position, long id) {
// TODO Auto-generated method stub
File selected = new File(fileList.get(position));
if(selected.isDirectory()){
ListDir(selected);
}else {
Uri selectedUri = Uri.fromFile(selected);
String fileExtension
= MimeTypeMap.getFileExtensionFromUrl(selectedUri.toString());
String mimeType
= MimeTypeMap.getSingleton().getMimeTypeFromExtension(fileExtension);

Toast.makeText(AndroidListFilesActivity.this,
"FileExtension: " + fileExtension + "\n" +
"MimeType: " + mimeType,
Toast.LENGTH_LONG).show();

}
}

void ListDir(File f){
File[] files = f.listFiles();
fileList.clear();
for (File file : files){
fileList.add(file.getPath());
}

ArrayAdapter<String> directoryList
= new ArrayAdapter<String>(this,
android.R.layout.simple_list_item_1, fileList);
setListAdapter(directoryList);
}
}


Related Posts:
- List files/directory in Android
- Navigation in files/directory
- Start activity using intent of ACTION_VIEW, for specified MIME type.


Oct 11, 2011

Navigation in files/directory

Navigation in files/directory

package com.AndroidListFiles;

import java.io.File;
import java.util.ArrayList;
import java.util.List;

import android.app.ListActivity;
import android.os.Bundle;
import android.os.Environment;
import android.view.View;
import android.widget.ArrayAdapter;
import android.widget.ListView;
import android.widget.Toast;

public class AndroidListFilesActivity extends ListActivity {

private List<String> fileList = new ArrayList<String>();

@Override
public void onCreate(Bundle savedInstanceState) {
super.onCreate(savedInstanceState);

File root = new File(Environment
.getExternalStorageDirectory()
.getAbsolutePath());
ListDir(root);

}

@Override
protected void onListItemClick(ListView l, View v, int position, long id) {
// TODO Auto-generated method stub
File selected = new File(fileList.get(position));
if(selected.isDirectory()){
ListDir(selected);
}else {
Toast.makeText(AndroidListFilesActivity.this,
selected.toString() + " selected",
Toast.LENGTH_LONG).show();
}
}

void ListDir(File f){
File[] files = f.listFiles();
fileList.clear();
for (File file : files){
fileList.add(file.getPath());
}

ArrayAdapter<String> directoryList
= new ArrayAdapter<String>(this,
android.R.layout.simple_list_item_1, fileList);
setListAdapter(directoryList);
}

}


prev:
- List files/directory in Android

next:
- Get File Extension and MIME Type


Oct 10, 2011

List files/directory in Android

List files/directory in Android
package com.AndroidListFiles;

import java.io.File;
import java.util.ArrayList;
import java.util.List;

import android.app.ListActivity;
import android.os.Bundle;
import android.os.Environment;
import android.widget.ArrayAdapter;

public class AndroidListFilesActivity extends ListActivity {

private List<String> fileList = new ArrayList<String>();

@Override
public void onCreate(Bundle savedInstanceState) {
super.onCreate(savedInstanceState);

File root = new File(Environment
.getExternalStorageDirectory()
.getAbsolutePath());
ListDir(root);

}

void ListDir(File f){
File[] files = f.listFiles();
fileList.clear();
for (File file : files){
fileList.add(file.getPath());
}

ArrayAdapter<String> directoryList
= new ArrayAdapter<String>(this,
android.R.layout.simple_list_item_1, fileList);
setListAdapter(directoryList);
}

}


next:
- Navigation in files/directory


Oct 8, 2011

Set background of ListView using drawable

To set background of istView to drawable, simple add "android:background" property in ListView to specify the background. And add "android:cacheColorHint" propertity also, otherwise, the background will become abnormal while scrolling.

exampe:
<ListView  
android:id="@+id/list"
android:layout_width="fill_parent"
android:layout_height="wrap_content"
android:background="@drawable/icon"
android:cacheColorHint="#00000000" />


Set background of ListView using drawable


Oct 3, 2011

Embeded Google Chart in WebView

Google Chart Tools provide a funny Chart Wizard to generate image charts. By using WebView, it's easy to embedded the charts inside your App.

Embeded Google Chart in WebView

In the Chart Wizard, select your chart, enter data, lets the wizard generate the chart, copy the link of "Paste link in email or IM" to embeddedWeb in the code.

Noted: In order to load the generated charts, permission of "android.permission.INTERNET" is need.

package com.AndroidEmbeddedWebView;

import android.app.Activity;
import android.os.Bundle;
import android.webkit.WebView;

public class AndroidEmbeddedWebViewActivity extends Activity {

WebView embeddedWebView;
String embeddedWeb = "http://chart.apis.google.com/chart?chxl=0:|Jan|Feb|Mar|Apr|May|Jun|Jul|Aug|Sep|Oct|Nov|Dec&chxt=x,y&chs=300x300&cht=r&chco=FF0000&chd=t:63,64,67,73,77,81,85,86,85,81,74,67,63&chls=2,4,0&chm=B,FF000080,0,0,0";

/** Called when the activity is first created. */
@Override
public void onCreate(Bundle savedInstanceState) {
super.onCreate(savedInstanceState);
setContentView(R.layout.main);
embeddedWebView = (WebView)findViewById(R.id.embeddedwebview);
embeddedWebView.loadUrl(embeddedWeb);
}
}


<?xml version="1.0" encoding="utf-8"?>
<LinearLayout xmlns:android="http://schemas.android.com/apk/res/android"
android:orientation="vertical"
android:layout_width="fill_parent"
android:layout_height="fill_parent"
>
<TextView
android:layout_width="fill_parent"
android:layout_height="wrap_content"
android:text="@string/hello"
/>
<WebView
android:id="@+id/embeddedwebview"
android:layout_width="300dp"
android:layout_height="300dp"
android:layout_gravity="center"
/>
</LinearLayout>

Infolinks In Text Ads