Dec 6, 2012

Draw path on SurfaceView's canvas

Example to detect touch events and draw path on SurfaceView's canvas accordingly.

Draw path on SurfaceView's canvas


package com.TestSurefaceView;

import java.util.Random;
import android.app.Activity;
import android.content.Context;
import android.graphics.Canvas;
import android.graphics.Color;
import android.graphics.Paint;
import android.graphics.Path;
import android.os.Bundle;
import android.view.MotionEvent;
import android.view.SurfaceHolder;
import android.view.SurfaceView;

 public class MainActivity extends Activity {
  
  MySurfaceView mySurfaceView;
  
  @Override
  public void onCreate(Bundle savedInstanceState) {
   super.onCreate(savedInstanceState);
   mySurfaceView = new MySurfaceView(this);
   setContentView(mySurfaceView); 
  }
  
  class MySurfaceView extends SurfaceView{

   Path path;
   
   Thread thread = null;
   SurfaceHolder surfaceHolder;
   volatile boolean running = false;
   
   private Paint paint = new Paint(Paint.ANTI_ALIAS_FLAG);
   Random random;
   
   public MySurfaceView(Context context) {
    super(context);
    surfaceHolder = getHolder();
    paint.setStyle(Paint.Style.STROKE);
    paint.setStrokeWidth(3);
    paint.setColor(Color.WHITE);
   }

   @Override
   public boolean onTouchEvent(MotionEvent event) {
    if(event.getAction() == MotionEvent.ACTION_DOWN){
     path = new Path();
     path.moveTo(event.getX(), event.getY());
    }else if(event.getAction() == MotionEvent.ACTION_MOVE){
     path.lineTo(event.getX(), event.getY());
    }else if(event.getAction() == MotionEvent.ACTION_UP){
     path.lineTo(event.getX(), event.getY());
    }
    
    if(path != null){
     Canvas canvas = surfaceHolder.lockCanvas();
     canvas.drawPath(path, paint);
     surfaceHolder.unlockCanvasAndPost(canvas);
    }

    return true; 
   }
  }
}


Related Post:
- Detect multi-touch, on SurfaceView

Dec 5, 2012

Capture screen with getDrawingCache() repeatly

In the article "Create custom dialog with dynamic content, updated in onPrepareDialog()", it demonstrate how to capture screen with setDrawingCacheEnabled() and getDrawingCache() methods. Unfortunately, it cannot work as expected! The screen is captured in the first time only. After that, every time call getDrawingCache() return the same first screen.

To solve it call setDrawingCacheEnabled(false) and then setDrawingCacheEnabled(true) to re-load the cache bitmap.

Modify onClick() method of btnCaptureScreen's OnClickListener:
     btnCaptureScreen.setOnClickListener(new OnClickListener(){
      
      @Override
      public void onClick(View arg0) {
       screen.setDrawingCacheEnabled(false);
       screen.setDrawingCacheEnabled(true);
       bmScreen = screen.getDrawingCache();
       showDialog(ID_SCREENDIALOG);
      }});


Capture screen with getDrawingCache() repeatly

Nov 28, 2012

Display custom TrueType Font (TTF)

To display text using custom TTF; create /assets/fonts folder and save your ttf files in it. Create custom Typeface using Typeface.createFromAsset() method and apply it on views by calling setTypeface() method.

Display custom TrueType Font (TTF)


package com.example.androidttf;

import android.os.Bundle;
import android.app.Activity;
import android.graphics.Typeface;
import android.widget.Button;
import android.widget.EditText;
import android.widget.TextView;

public class MainActivity extends Activity {

 @Override
 protected void onCreate(Bundle savedInstanceState) {
  super.onCreate(savedInstanceState);
  setContentView(R.layout.activity_main);
  
  TextView testText = (TextView)findViewById(R.id.testtext);
  Button testButton = (Button)findViewById(R.id.testbutton);
  EditText testEditText = (EditText)findViewById(R.id.testedittext);
  
  Typeface typeface_Abbeyline = Typeface.createFromAsset(getAssets(), "fonts/Abbeyline.ttf");
  Typeface typeface_36daysag = Typeface.createFromAsset(getAssets(), "fonts/36daysag.ttf");
  Typeface typeface_AtomicClockRadio = Typeface.createFromAsset(getAssets(), "fonts/AtomicClockRadio.ttf");
  testText.setTypeface(typeface_Abbeyline);
  testButton.setTypeface(typeface_36daysag);
  testEditText.setTypeface(typeface_AtomicClockRadio);
 }

}


<LinearLayout xmlns:android="http://schemas.android.com/apk/res/android"
    xmlns:tools="http://schemas.android.com/tools"
    android:layout_width="match_parent"
    android:layout_height="match_parent"
    tools:context=".MainActivity" 
    android:orientation="vertical">

    <TextView
        android:layout_width="wrap_content"
        android:layout_height="wrap_content"
        android:text="@string/hello_world" />
    <TextView
        android:id="@+id/testtext"
        android:layout_width="match_parent"
        android:layout_height="wrap_content"
        android:text="I'm a TextView" />
    <Button
        android:id="@+id/testbutton"
        android:layout_width="match_parent"
        android:layout_height="wrap_content"
        android:text="I'm a Button" />
    <EditText
        android:id="@+id/testedittext"
        android:layout_width="match_parent"
        android:layout_height="wrap_content" />

</LinearLayout>


Nov 22, 2012

Monitor battery level

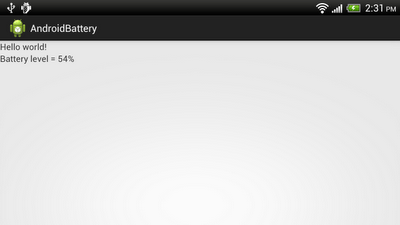
This code monitor battery level by registering our BroadcastReceiver with IntentFilter for Intent.ACTION_BATTERY_CHANGED.

Monitor battery level of Android device


package com.example.androidbattery;

import android.os.Bundle;
import android.app.Activity;
import android.content.BroadcastReceiver;
import android.content.Context;
import android.content.Intent;
import android.content.IntentFilter;
import android.widget.TextView;

public class MainActivity extends Activity {
 
 TextView batteryStatus;

 @Override
 protected void onCreate(Bundle savedInstanceState) {
  super.onCreate(savedInstanceState);
  setContentView(R.layout.activity_main);
  batteryStatus = (TextView)findViewById(R.id.batterystatus);
  
  IntentFilter batteryFilter = new IntentFilter(Intent.ACTION_BATTERY_CHANGED);
  registerReceiver(batteryMonitor, batteryFilter);
 }

 private BroadcastReceiver batteryMonitor
 = new BroadcastReceiver(){

  @Override
  public void onReceive(Context arg0, Intent arg1) {
   int batteryLevel = arg1.getIntExtra("level", 0);
   batteryStatus.setText("Battery level = " + String.valueOf(batteryLevel) + "%");
  }};

}


<LinearLayout xmlns:android="http://schemas.android.com/apk/res/android"
    xmlns:tools="http://schemas.android.com/tools"
    android:layout_width="match_parent"
    android:layout_height="match_parent"
    tools:context=".MainActivity" 
    android:orientation="vertical">

    <TextView
        android:layout_width="wrap_content"
        android:layout_height="wrap_content"
        android:text="@string/hello_world" />
    <TextView
        android:id="@+id/batterystatus"
        android:layout_width="wrap_content"
        android:layout_height="wrap_content"/>
        
</LinearLayout>


Nov 1, 2012

Remove View dynamically using Java code

Last post "Insert ImageView dynamically using Java code", by clicking on buttons. Removing function is added here to remove clicked ImageView from parent ViewGroup.

Remove View dynamically using Java code


Modify the Java code from last post, adding OnClickListener to the ImageViews to remove itself from its parent.
package com.example.androidinsertimages;

import android.os.Bundle;
import android.app.Activity;
import android.view.View;
import android.view.View.OnClickListener;
import android.view.ViewGroup;
import android.widget.Button;
import android.widget.ImageView;
import android.widget.LinearLayout;

public class MainActivity extends Activity {
 
 Button addinHorizontalScrollView, addinScrollView;
 LinearLayout inHorizontalScrollView, inScrollView;

    @Override
    public void onCreate(Bundle savedInstanceState) {
        super.onCreate(savedInstanceState);
        setContentView(R.layout.activity_main);
        
        inHorizontalScrollView = (LinearLayout)findViewById(R.id.inhorizontalscrollview);
        inScrollView = (LinearLayout)findViewById(R.id.inscrollview);
        
        addinHorizontalScrollView = (Button)findViewById(R.id.addinhorizontalscrollview);
        addinHorizontalScrollView.setOnClickListener(new OnClickListener(){

   @Override
   public void onClick(View arg0) {
    addImageView(inHorizontalScrollView);
   }});
        
        addinScrollView = (Button)findViewById(R.id.addinscrollview);
        addinScrollView.setOnClickListener(new OnClickListener(){

   @Override
   public void onClick(View arg0) {
    addImageView(inScrollView);
   }});
        
    }
    
    private void addImageView(LinearLayout layout){
     ImageView imageView = new ImageView(this);
     imageView.setImageResource(R.drawable.ic_launcher);
     layout.addView(imageView);
     
     imageView.setOnClickListener(viewOnClickListener);
    }

    OnClickListener viewOnClickListener
    = new OnClickListener(){

  @Override
  public void onClick(View v) {
   ViewGroup parent = (ViewGroup)v.getParent();
   parent.removeView(v);
  }
    };
}


The layout file refer to last post.


Infolinks In Text Ads